Modifying an Existing Robot
Now that you can navigate models comfortably in Onshape, it's time to see how Onshape can help your team build a better, more competitive robot.
Imagine your team is building a robot that picks up and launches discs. To be efficient, one group of team members works on the Drivetrain assembly while another group works on the Intake/Launcher assembly. Everything goes well until you put the full robot together and start testing...
Something's Wrong
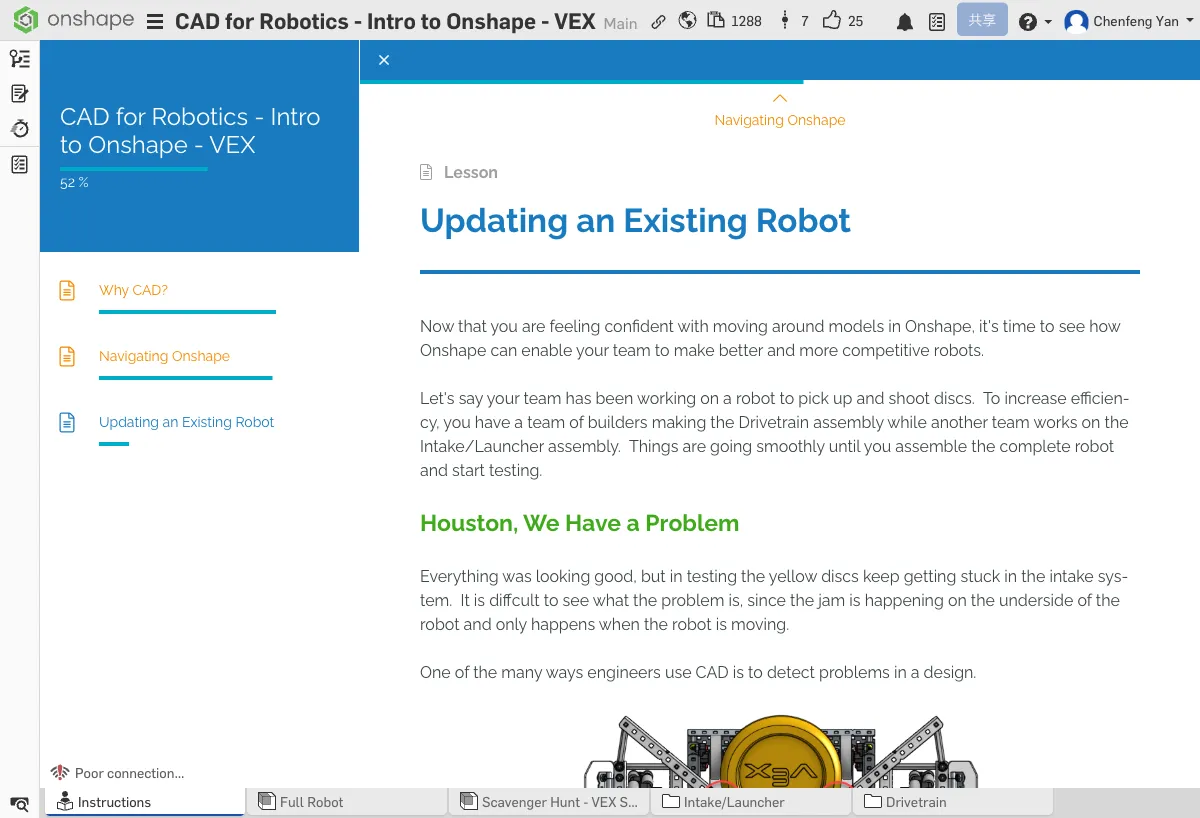
Everything looks good, but during testing, the yellow discs keep getting stuck in the intake system. It's hard to see the problem because the jamming happens on the bottom of the robot and only when it's moving.
One important way engineers use CAD is to identify design problems.
Using the View Cube, you can switch to the robot's bottom view and see the issue: the drivetrain group made guide rails to direct discs into the intake system, but they're too close together, causing discs to jam. Let's use Onshape to fix this.
We recommend making a copy of the document to your own account before making changes
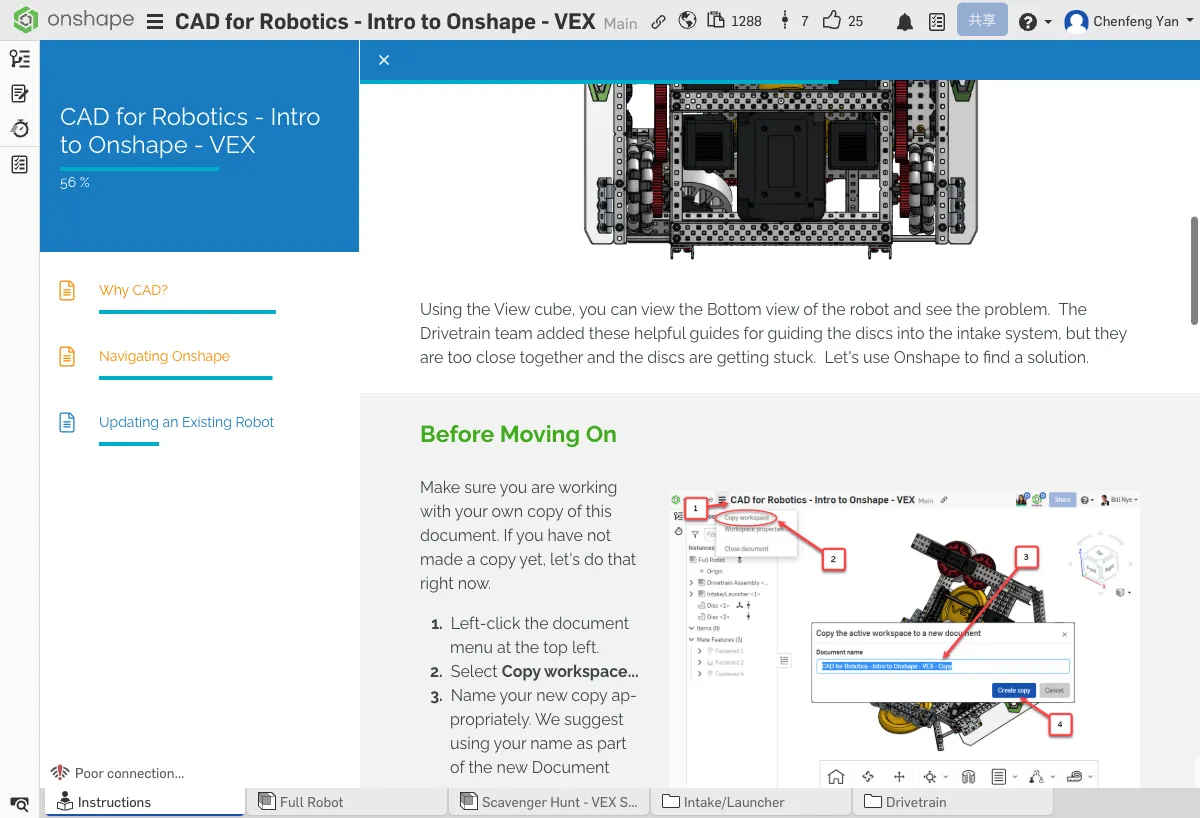
- Click the document menu in the top left corner
- Select Copy workspace...
- Give the new copy a name (we recommend including your name)
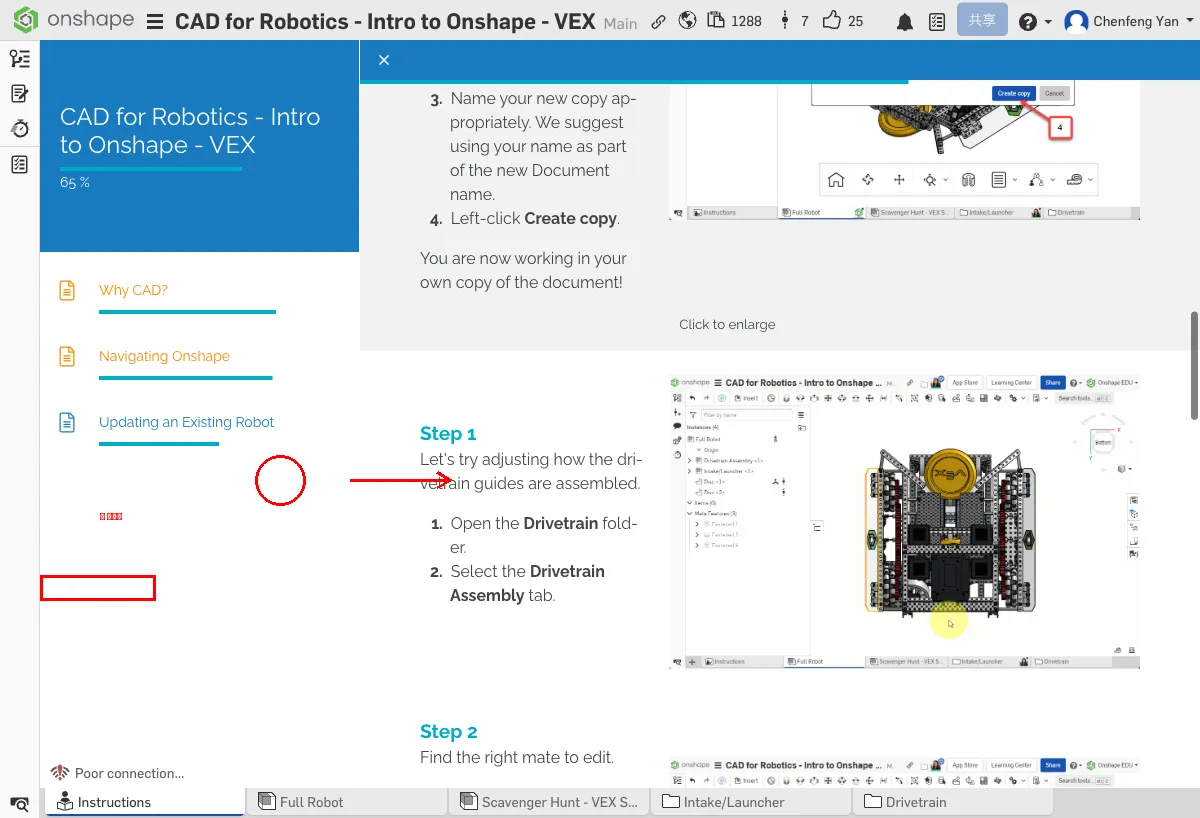
- Click Create copy
Now you're working in your own copy!
The document name in the top left should include your name, and it should show your own workspace
No worries, many people run into issues with this step!
Make sure you clicked the document menu in the top left (the three-line icon), then selected Copy workspace. If you don't see this option, you might be in the original tutorial document instead of your own copy.
A mate tells Onshape: "Align this point on this part to that point on that part." It's like building with LEGO — you pick two connection points and Onshape snaps them together. Picked the wrong point? The part goes flying. No worries, just Ctrl+Z to undo and try again.
- Ctrl+Z to undo — solves 90% of mistakes
- Check your selection — is the white dot in the right spot?
- Delete and redo — right-click the mate → Delete. Starting over is faster than debugging
More troubleshooting tips in the First Aid Guide
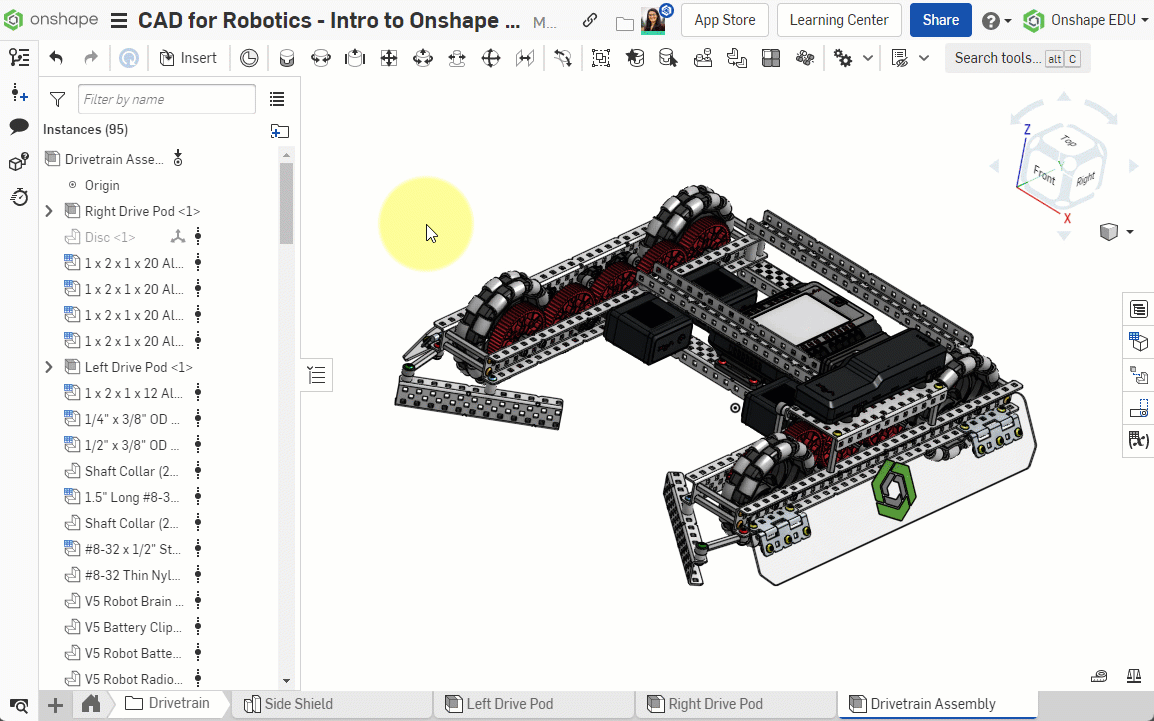
Open the Drivetrain Assembly
Let's adjust how the drivetrain guide rails are assembled.
- Open the Drivetrain folder
- Select the Drivetrain Assembly tab
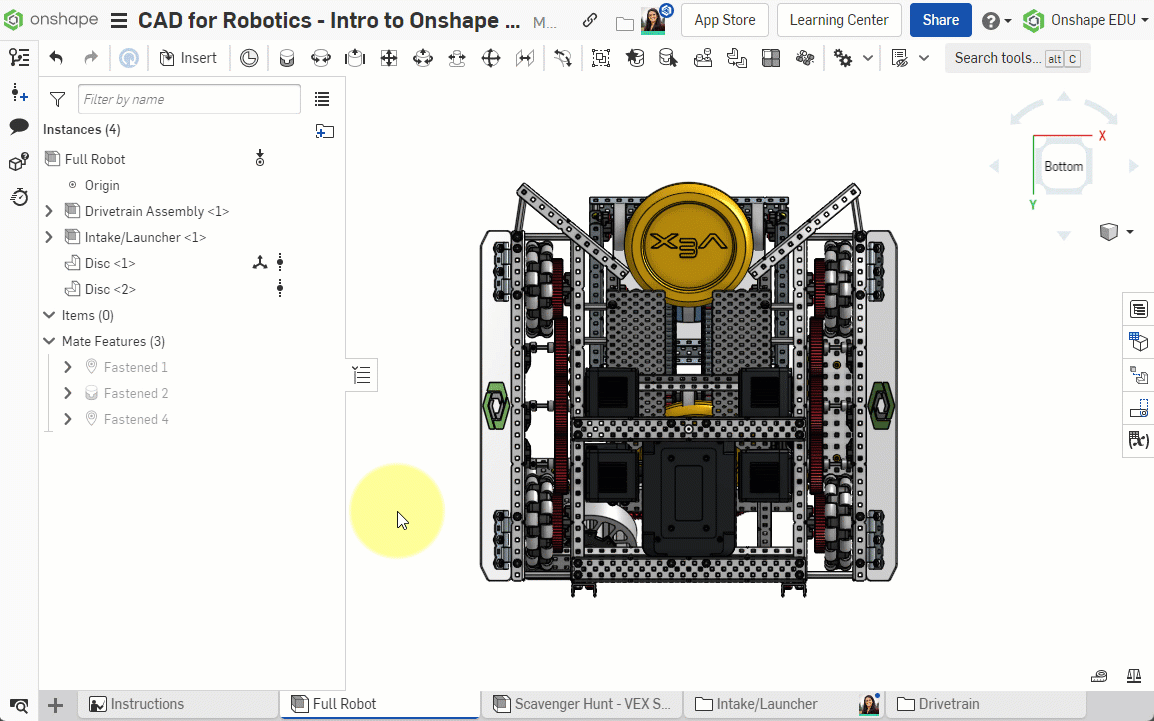
You should see a 3D model of the drivetrain on screen, with the Drivetrain Assembly tab highlighted at the bottom
No worries, many people run into issues with this step!
If you can't see the 3D model, try: 1) Press F to fit the view 2) Check that the Drivetrain Assembly tab is selected at the bottom 3) Make sure parts aren't hidden in the left panel (check the eye icons)
Can't find the Drivetrain folder?
Click the folder icon in the left panel to expand the directory tree. Drivetrain is in the root directory.
Don't see tabs at the bottom?
Scroll down — the tabs are at the very bottom of the Onshape window. If the window is too small, they might be hidden.
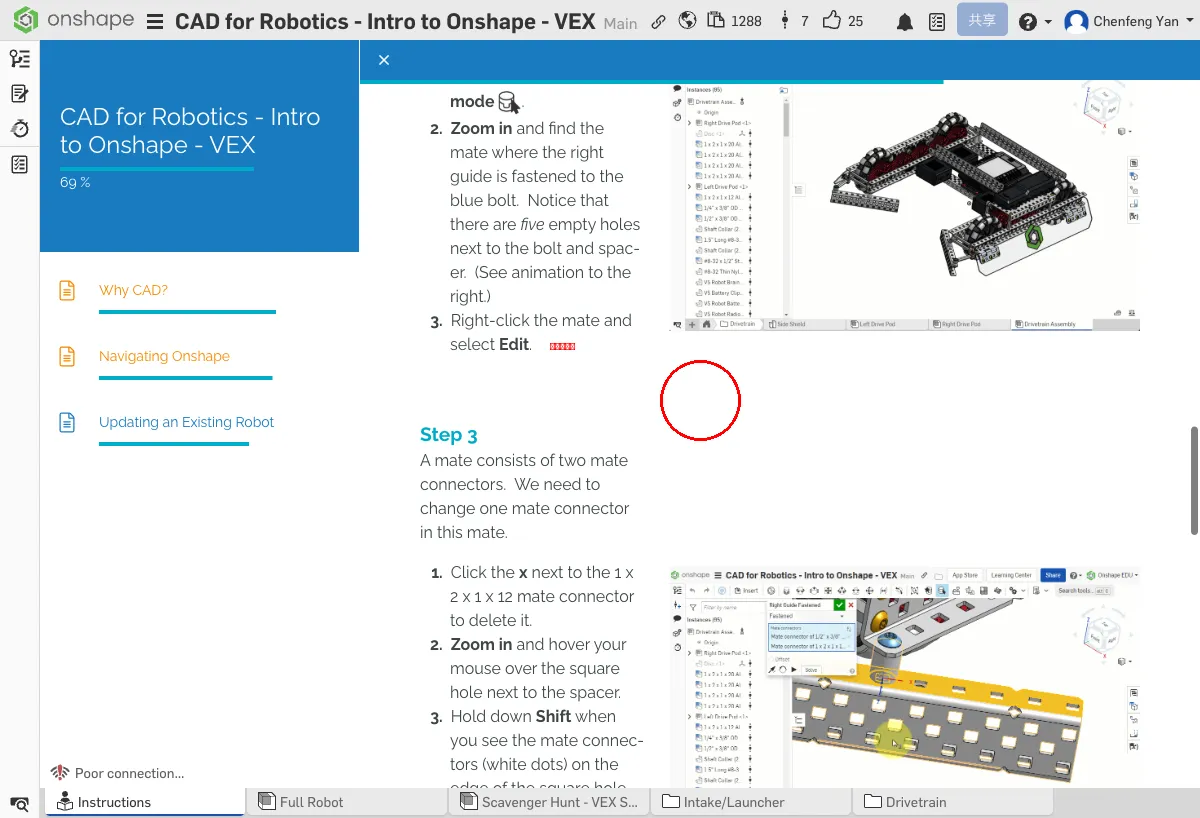
Find the Mate to Edit
- Enable Show mates mode
- Zoom in to find the mate connecting the right guide rail to the blue bolt. Note the five empty holes next to the bolt and washer (refer to the animation)
- Right-click the mate and select Edit

You should see a popup showing two mate connectors, with the blue bolt and five empty holes nearby
No worries, many people run into issues with this step!
If right-clicking does nothing: 1) Make sure Show mates mode is enabled 2) Zoom in close to the bolt to see the mate icons 3) Mate icons are small blue/green dots, not the parts themselves
Can't find the Show mates mode button?
Look for a connection-point icon in the top-right toolbar, or go to View → Show Mates in the menu bar.
Right-click not working?
Make sure you're clicking on the mate icon (small blue/green dot), not the part itself. You need to enable Show mates mode first to see mate icons.
Can't find the right mate?
Zoom in to where the guide rail connects to the blue bolt. The mate icon is on the bolt. Count the empty holes next to it — there should be five.
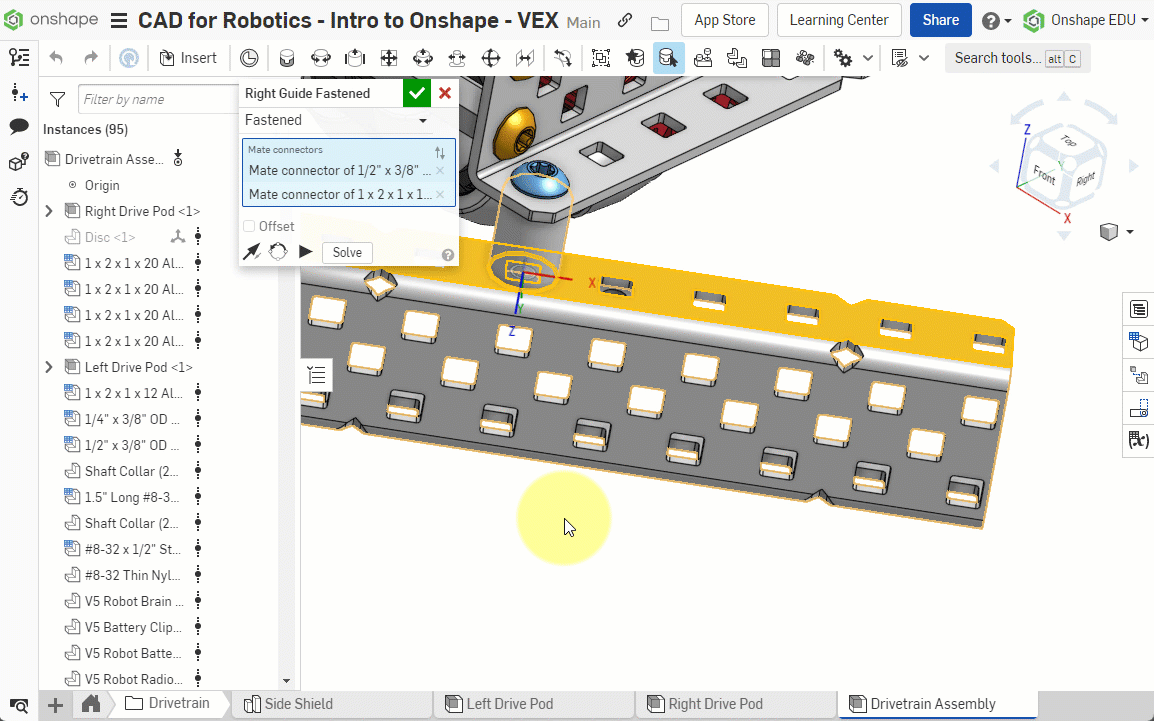
Change the Mate Connector
A mate consists of two mate connectors. We need to replace one of them.
- Click the x next to the 1 x 2 x 1 x 12 mate connector to delete it
- Zoom in and hover over the square hole next to the washer
- When you see the mate connector (white dot) appear on the edge of the square hole, hold Shift
- Click the mate connector at the center of the square hole
- Click Solve to check the new mate. There should now be only four empty holes next to the washer
- Click the green checkmark to confirm
After clicking Solve, there should be only four empty holes next to the washer (instead of five). If unchanged, re-check that you selected the mate connector at the center of the square hole
Can't see white dots after pressing Shift?
You need to hover over the square hole edge first, wait for the white dot to appear, then press Shift. If you still can't see it, try zooming in closer.
Still five empty holes after Solve?
You selected the wrong mate connector. Press Undo (Ctrl+Z) and try again — select the white dot at the center of the square hole, not the edge.
How to undo a mistake?
Press Ctrl+Z (Cmd+Z on Mac) to undo the last action. Don't worry about breaking the model.
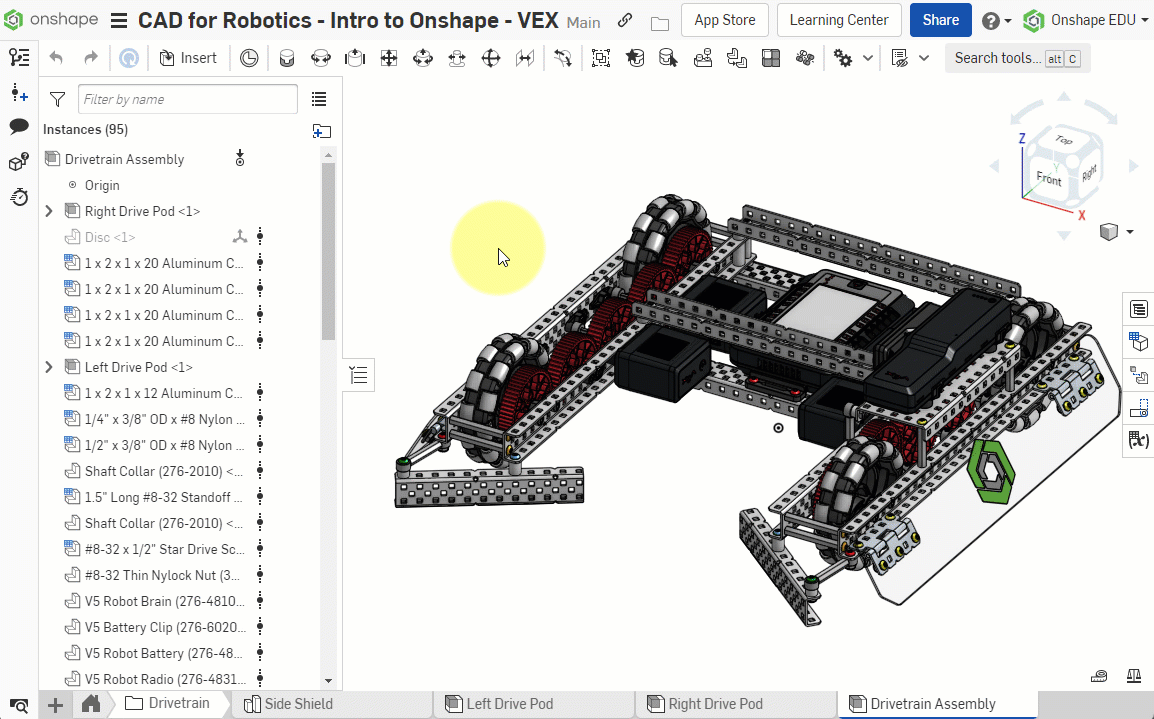
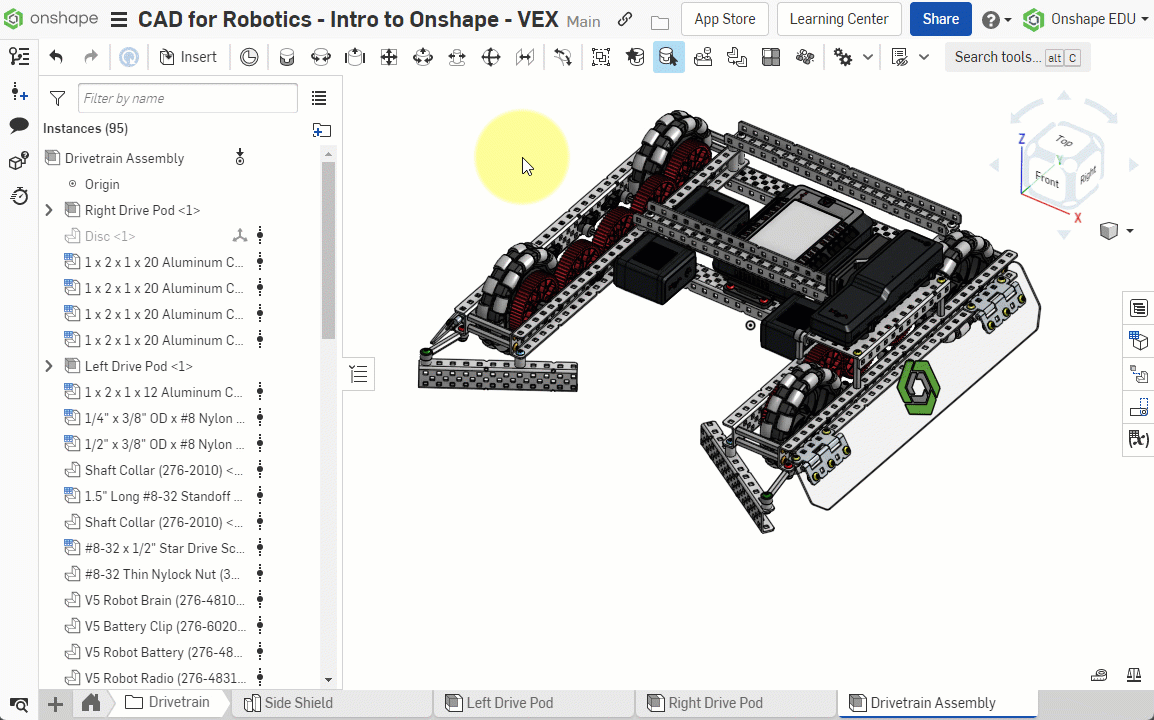
Repeat on the Other Side
Repeat the same process on the other side. Remember:
- Show mates mode helps you select the right mate
- Hold Shift to lock the displayed mate connectors on screen
- Solve lets you preview how the change affects the assembly
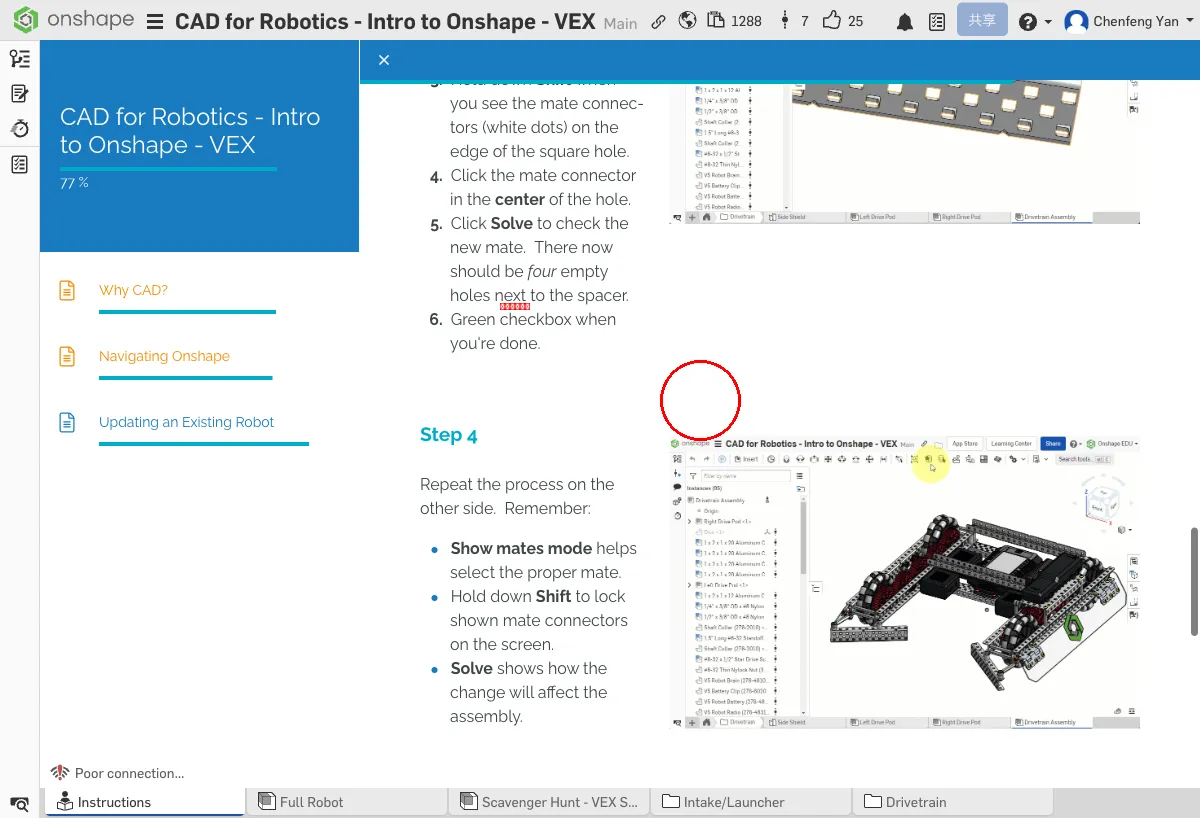
Both guide rails should have moved out by one hole, leaving more space for the discs
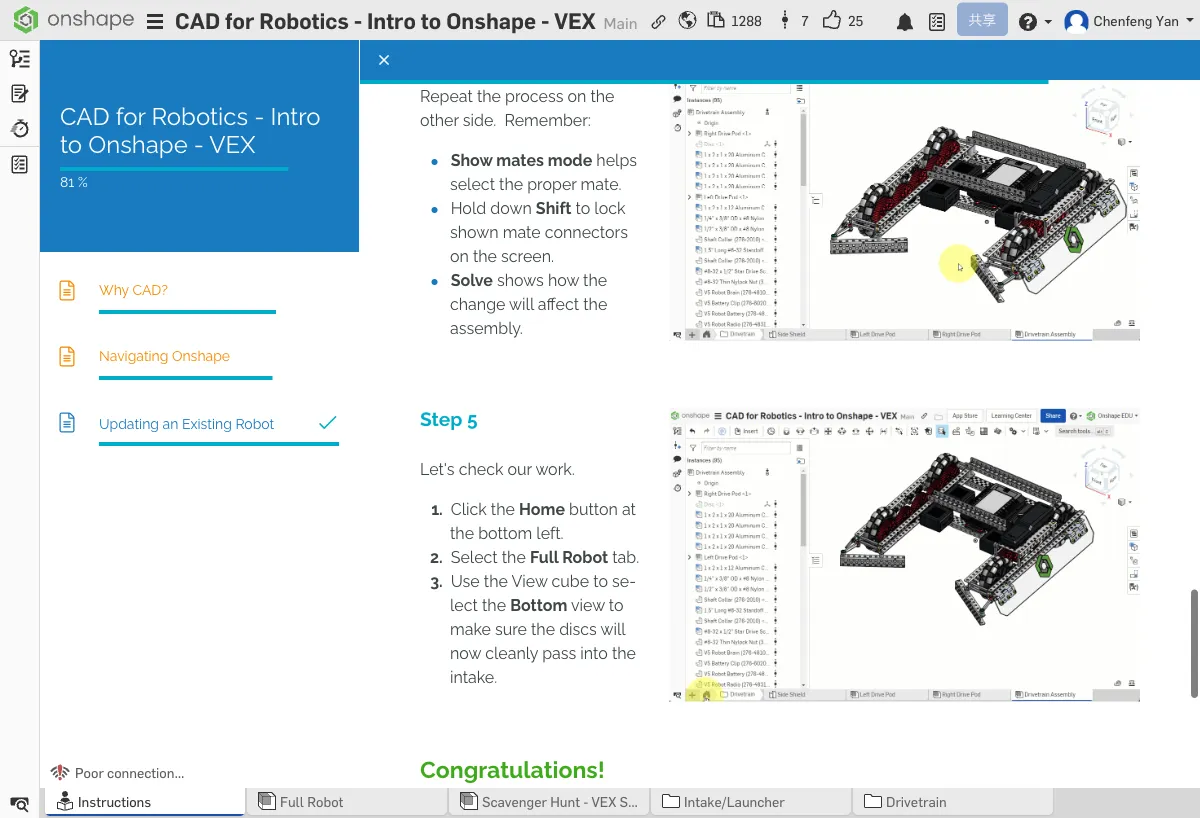
Verify the Fix
Let's verify the fix was successful.
- Click the Home button in the bottom left
- Select the Full Robot tab
- Use the View Cube to switch to the Bottom view and confirm that discs can now pass through the intake system smoothly
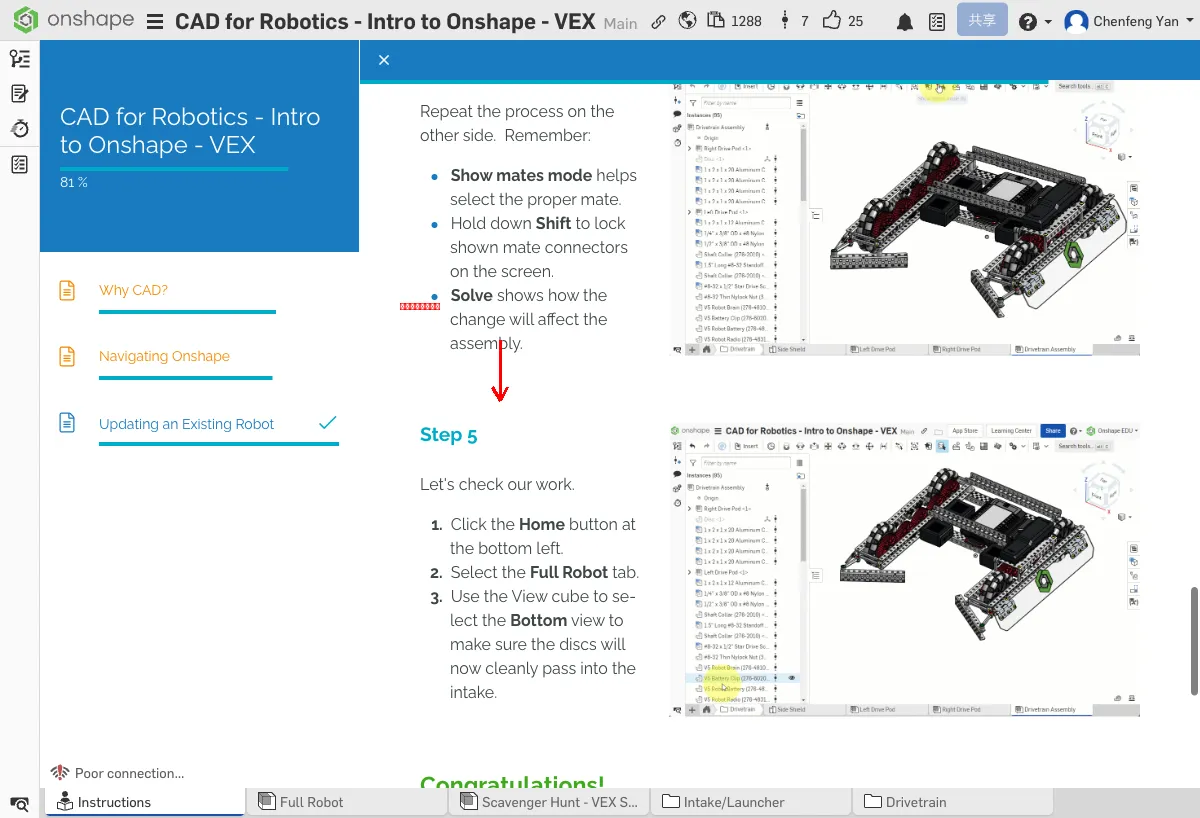
The gap between the two guide rails should be wider than before, allowing the yellow discs to slide into the intake system smoothly
Before vs. After
Congratulations!
Building your robot model in Onshape makes design troubleshooting fast and easy. The drivetrain group can now quickly adjust their design and continue testing.
You've learned three core Onshape skills: understanding the value of CAD, navigating and manipulating models, and editing assembly mates.
What You Learned in This Chapter
- Use the View Cube to switch angles and find design problems
- Edit Mates to adjust part positions
- Always copy the document to your own account before making changes
Quick Quiz
When a part is in the wrong position, what do you edit to fix it?